Monday, May 30, 2011

It's True: they sleep, they creep, they leap


All my little Hosta's finally leaped this year, 3 years after moving them to this new spot. Of course, now they have grown so much since last year that they need dividing, but the Heucheras and Astilbes planted in there haven't bloomed yet and I don't want to disturb them.

More garden photos:

Heucheras among the hostas


Brunnera 'Jack Frost'


Bath's Pinks


Purple Siberian Iris

White Siberian Iris


Saturday, May 28, 2011

Life Expectancy of saved garden seeds

Wax Bean Seed photo by dyogi

If, like me, you are thinking of saving vegetable seeds for a future garden, here's some info about shelf life. Within these time frames, stored seed will remain viable, although germination rates may decline a little.

Typical seed life if stored in cool, dry conditions:

5 years

Broccoli
Brussels Sprouts
Cabbage
Chinese Cabbage
Celery
Chicory
Corn Salad (Mache)
Cress (both garden cress and watercress)
Kale
Kohlrabi
Lettuce
Muskmelons
Radish
Spinach

4 years
Beet
Fennel
Mustard
Pumpkin
Rutabaga
Squash (both summer and winter varieties)
Swiss chard
Tomato
Turnip
Watermelon

3 years
Asparagus
Beans
Carrot
Chervil
Cowpea
Leek
Pea
Sorrel

2 years
Corn
Dandelion
Okra
Pepper
Salsify (black)

1 year
Onion
Parsley
Parsnip
Salsify

Source: Knott’s Handbook for Vegetable Gardeners, 1980 ed.

Thursday, May 26, 2011

Mini Retort for Charcoal/Ash

I'm in the planning stages for making a variety of cheeses, and getting my list together of ingredients like starter cultures, aroma-producing bacterial and yeast additives, colorings, and even some ash used in a goat cheese like Humboldt Fog. (Who could resist a name like that?) Ash is basically activated charcoal, and easy to make at home in a semi-retort. One less thing to buy!

In the chemical industry, a retort is an airtight vessel in which substances are heated for a chemical reaction producing gaseous products to be collected in a collection vessel or for further processing. A retort is also used to make charcoal to burn in a small forge. I have a homemade retort for making charcoal, which I inoculate and use as biochar for my garden. However, it is a 30 gallon drum inside a 55 gallon drum... far too large for making ash for cheese, and I really does not capture the gases to use as fuel for the burn in process. (That type of process is described here.)

What I want for making food-grade ash is a miniature retort-style container that will drive off the gases and totally char the wood inside. Then I can grind the char into a powder via a spare coffee grinder for later use in my cheese. 

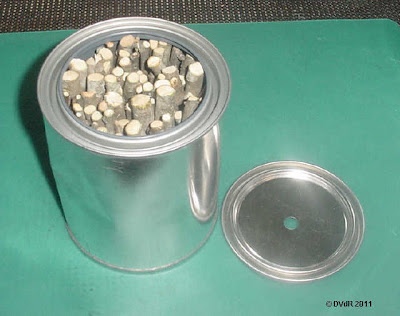
I bought a new, clean paint can, quart-size. (I may need to upgrade to a gallon size after I see how this works.)


The wood of choice for this type of ash is a fruit or nut wood or grape vines, and I had some branches available from pruning an apple tree. They do not have to be totally dry although that is best; green wood cuttings just have a higher moisture content that will still be driven off, just requiring more time and fuel for the fire itself. The retort needs to be stacked as tightly as possible to eliminate a lot of oxygen (which creates pressure inside the can when heated) from the get-go. Then the lid needs a small hole to let the heated gases escape (and prevent the can from blowing up!). I made a 3/8" hole, which may be too large, but I won't know until I try it.

Now it's prepared for the next time I build a fire, when I will put the tightly closed can on the fire/logs/coals so that I can watch the vent. When the can contents get red hot, the vent hole will start to smoke, and soon the smoke will turn to white. The water content will start to be driven off at 212ºF, and the wood will start to char at around 500ºF. After some time, maybe an hour or more depending on the temp of the fire and the moisture content inside the can, the white smoke will stop entirely, indicating all the volatile gases have been driven off.

The next step after you think the wood had charred sufficiently, is remove the can from the fire with fireplace gloves or tongs and set on a fireproof surface to cool at least 24 hours. Now it should be ready to crush and grind to a powder.


Later: I finally 'fired' the can of twigs, with only moderate success. Here just above you can see the fine smoke beginning to trail out of the hole in the can lid.


I apparently did not have either a hot-enough fire, or too small a fire... the twigs charred appropriately on the bottom, but not all the way up to the top, even though I left them on the burning briquettes and embers overnight.


Now that I'm thinking about that particular fire, I remember I used briquettes from the same bag last fall for my first cold smoking, and they produced only a very short-lasting heat. When the briquettes became covered with ash, they cooled considerably. To fully char these apple twigs, I'll apparently need build a hot wood fire to char the apple twigs.

If all else fails, I can always buy ash, but I'm NOT giving up yet!


Tuesday, May 24, 2011

Comfrey as Fertilizer, and Animal Feed

One of my several comfrey plants

I grow a lot of comfrey and it makes a great fertilizer. That's because comfrey is known as a dynamic accumulator, meaning the roots grow very deep (as much as 10 feet) and "mine" nutrients... that is, they bring nutrients up from the sub-soil and into their leaves. Those nutrients then can feed other plants if the comfrey leaves are used as a fertilizer.

Comfrey leaves have twice the nitrogen of composted manure,  about 18 times the potash, and 59 times the amount of phosphorus.

There are several ways to make fertilizer from comfrey leaves. The leaves can be put in water to dissolve, and be used as a fertilizing tea, or mixed with other liquid fertilizers. They can be put in a bucket where they will wilt and then dissolve into a very smelly liquid which can be thinned with 15 parts of water for a foliar feed or a fertilizing tea. You can also add the leaves to a compost pile.

Personally, I like to line trenches with several layers of fresh-cut leaves, cover them with a layer of dirt, and plant potatoes in the trench. I also just lay a few of layers of leaves along the sides of my tomato plants as a feeding mulch.

There are a few other plants that are also dynamic accumulators. The list includes arrowroot, borage, buckwheat, carrot leaves, chicory, clovers, daikon, kelp, lemon balm, marigold, mints, stinging nettle and yarrow. I'm sure there are others but those are the ones I know about. Most of those do not "mine" as deeply as comfrey, though.

Comfrey as Animal Feed

Comfrey is of great value as a feedstock.
 

Apparently pigs love it and will happily consume up to 20lbs a day! The Nihon Agricultural
University in Japan stated that: ‘a noticeable result was the improved health of the pigs
fed on comfrey’
not only from the allantoin, which banished scouring, but better mineral
balance.
 

Comfrey has been successfully fed to a wide range of animals from racehorses through
sheep and cattle to exotic animals such as giraffes.
 

For the homeowner and gardener who may keep poultry, comfrey can provide a
useful and productive addition to the their diet. The simple digestive system of the hen contains no bacteria or stomach enzyme able to digest cellulose so the hen receives no value from high-fiber diets. In fact this is a positive disadvantage because when the crude fiber
content reaches 10% or more, there can be a reduction in the digestibility of carbohydrates. This will cause  a fall in egg yields and delayed maturity even if the rest of the diet is nutritious.
 

Comfrey provides a low fiber, high protein and high mineral feed which can effectively replace some costly concentrates in the poultry diet. Comfrey is best served wilted and shredded, with the fibrous stalks removed to further decrease the fiber. 5 plants per laying hen should provide enough comfrey for feeding purposes.
 

Obviously comfrey is available in winter in most of the US (unless silaged) so should be replaced with other foodstuffs, such as kale or cabbage.

Sunday, May 22, 2011

Dehydrating Spinach, Strawberries


I will have an abundance of spinach growing in the garden soon, probably more than I can ever eat while it is fresh. In the meantime, I bought a pound of fresh spinach at the Farmer's Market for a recipe I didn't get around to making before the spinach would have gone bad.

Since I'd rather not depend on my freezer any more than I need to, I decided to dehydrate the spinach and store it in a jar on the pantry shelf. Spinach dries quickly and easily, although mine was still very wet from washing the grit out. It took 2-3 hours at 120ºF. (Gotta get a solar dryer built this year!) It really did not loose the bright green color, that's just a poor photo and bad lighting.


Dried spinach can be used in soups and stews all winter. Add it to tomato sauce, or scrambled eggs. You could pulverize it and add for nutritional value to almost any liquid, especially something like V-8 juice.


I put a piece in some water to rehydrate, just to see what it night be like texture-wise to use as leaf spinach in recipes later. I think it would be just fine; it was supple and not fragile at all. For sure I'll use it in a spinach lasagna!


I ended up with a quart jar packed pretty tight with dehydrated spinach. I might make more if I have an abundance of spinach in the garden. 


I have also been dehydrating strawberries, since the local berries are in season now... and cheap. Believe it or not, that pint jar above holds what was a pound and a half of fresh berries! I cut them to just a tad over a ¼" thick; the dried berries are well under ⅛" thick. Man, did they smell delightful as they were in the dehydrator!

Friday, May 20, 2011

Buying Salmon Tip


I follow Langdon Cook's blog, Fat of the Land. (His new book is Fat of the Land: Adventures of a 21st Century Forager.)

Recently he reviewed a book on sustainable seafood recipes, Good Fish: Sustainable Seafood Recipes from the Pacific Coast by Becky Selengut. In his review, he had this to say about one of the many tips from her book, and I thought I'd pass it on for anyone purchasing salmon.

"I like to think I know a few things about Pacific fish, but I'm always learning from Becky, even on familiar subjects. For instance, in her salmon chapter, she gives some buying tips that includes this useful nugget: 'Look carefully at the pin bones. If you see a divot around the pin bones, it's a sign that the fillet is old.' "

When I lived in a city, I could just ask at the fish counter to smell any fish up close so I detect if it smelled fresh. Now the markets here all wrap their fish in plastic wrap on a tray, and there's no way to smell it for freshness. The last salmon I bought smelled fishy right out of the package but I was already 35 miles away from the store, at home. Now at last I have a visual clue, thanks to Langdon Cook and Becky Selengut!
I don't buy much fish anymore except local wild stream trout, but I have her book and Langdon's both on my Wish List. Foraging ideas from Langdon Cook's book may become much more important as the cost of our food keeps going up, and Becky Selengut's book covers sustainable fish, which all fish are NOT. If I'm going to eat fish, I prefer not to eat fish that are being overfished and rapidly disappearing.

Wednesday, May 18, 2011

Marking freezer containers


I saw this tip on Michael Rhulman's blog and just HAD to pass it on...

Easy and cheap way to mark containers for the freezer, or even leftovers for the refrigerator, is with painter's tape from a hardware store, and a magic marker. I've been using freezer tape, or a slip of paper and scotch tape, but this is so much cheaper, plus the tape is wide enough to also hold the date in a small space!

Monday, May 16, 2011

A Farm for the Future

I chanced across a fantastic British documentary video series recently, A Farm for the Future. It is perhaps one of the most positive and thought-provoking things I've seen or read in some time.

I am quite impressed with how it builds to include some very promising solutions for farmers caught in the energy crunch and what that will do to our food supply. Nothing presented was actually a totally new concept to me, but the way the series takes one woman beef farmer through the realizations of oil shortages and increasing costs all the way up to some workable solutions is quite well done.

I came away with a much better understanding of some basic, workable concepts like a forest garden. I have read the concept of forest farming here and there, but it was all text and line drawings, and I hadn't any real understanding. Seeing two examples on film in real life with some explanations to how and why it works totally changed my viewpoint, and I plan to begin some implementation here at home as money and time permits, in the form of guilds. It is the only thing that now makes sense to me in becoming sustainable in an uncertain future. Martin Crawford, who explains and demonstrates forest gardening (including animal feed from one) on the last 2 videos, has a book explaining how to do it yourself. The book is Creating a Forest Garden: Working with Nature to Grow Edible Crops. Another good book is Gaia's Garden.

I encourage everyone concerned about the future of our food supply (and that's everything from our own home gardens to giant corporations that are farming thousands of acres) to watch all 5 videos; they each are fairly short. Here's the link to the first one, and it will lead you to the others in order.


Sunday, May 15, 2011

Blog Birthday / Anniversary!

Photo by Leon Wilson

Today marks two years of posting on this blog. In that time, it has grown from a very few followers who are mostly old friends who just supported my initial efforts, to now over sixty followers... and that number does not include the readers who follow with an RSS feed. (I have no way of knowing how many follow in that manner.)

Page views have grown from a handful a week, to nearly 200 per day... that number also does not include RSS feed page views. Viewers come from all over the world

I must say that I am extremely pleased, esp. considering that as of late 2009 there were over 126 million blogs, and growing!

Folks have asked if I get any remuneration from my blog. I do not. I consider writing my blog as "paying it forward" for all the help, instruction and ideas that people have sent my way throughout my lifetime. 

Photo by MShades

If anyone gets just a little help, a little more understanding of something, some encouragement or even some inspiration from my blog, it's just icing on the cake!

Saturday, May 14, 2011

Making Neufchâtel Cheese


Actually it is American Neufchâtel, which is a low-fat cream cheese. I plan to make cheesecake with my American Neufchatel, but it also makes a good base for adding herbs or garlic to use as a spread. (Real Neufchâtel is a soft, slightly crumbly, mould-ripened cheese made in the region of Normandy in France. It looks similar to camembert, with a dry, white, edible rind, but the taste is saltier and sharper.) 

The recipe is very simple:
2 gallons of skim milk
1 cup cultured buttermilk or yogurt or raw milk clabber (I used non-fat buttermilk)
1/4 tsp. liquid rennet (or half a rennet tablet dissolved in 1/4 cup cool distilled water)

Whisk buttermilk until thin, and whisk in the rennet. Then whisk the mixture into the milk. Allow to set at about 72ºF for 10-12 hours. I started mine in the evening so it could mature overnight... otherwise I'd be doing the draining well into the night!

Curds after overnight maturation. Notice the yellow whey gathering on top.

Soft Curds (partial amount) Draining

The next morning, ladle the curds into a butter-muslin (or fine cheesecloth) lined colander and allow to drain. You might have to scrape the inside of the muslin as the curds will form a film that slows or even stops the draining.


When it has drained the consistency you want, put the curds in a big bowl and add salt one teaspoon at a time, tasting until you get the flavor you like. I added just 2 teaspoons of salt, which is barely salty enough for my taste. (I will adjust if necessary when I make the cheesecake.) Salt keeps the cheese from tasting too bland, and helps it keep longer. 

Wrap in waxed paper or recycled plastic food containers and refrigerate. My 2 gallon batch weighed 53.3 oz., or 6½ packages of store-bought cream cheese only better, and without additives to thicken it.

Friday, May 13, 2011

Ag Gag Bills

I've been watching the proliferation of recently Ag-Gag Bills, and frankly I am fed up with BigAg trying to run my life, and to hide from whistle-blowers. Right now BigAg is pushing legislators in Florida, Minnesota and Iowa to criminalize taking photos or videos of their facilities. (Update: the Florida Bill SB 1246 failed.)

I'm pretty sure not all CAFO's are ugly and inhumane ... but some are. Now "they" want to make it a crime to take photos of a facility that indulges in practices that would turn our stomachs, much less the thought of buying their meat.

What are they fearing? The way factory farming mistreats animals, workers AND the environment? 

Environmental Protection Agency head Lisa Jackson assured a gathering of agricultural leaders in Iowa that her agency has no plans to regulate farm runoff, despite its hazards. 

On the other hand, the Des Moines Register reported, “Runoff of nitrogen and phosphorus from farms damages water quality in Iowa and elsewhere in the Mississippi basin and contributes to a dead zone in the Gulf of Mexico.”

The Bill approved in the Iowa House and Senate sponsored by Rep. Annette Sweeney, a Republican and a former executive director of the Iowa Angus Association, would not only punish whistleblowers but also those who take jobs for the sole purpose of exposing abuses. Those convicted could face penalties include fines of up to $7,500 and five years in prison. 

People for the Ethical Treatment of Animals, or PETA, say: “They’re trying to criminalize someone being an eyewitness to a crime,” Jeff Kerr, the organization’s general counsel, said. The measure was introduced after humane groups released videos showing chicks being ground alive and pigs being beaten and shocked.

Kansas and Montana have passed anti-whistleblower laws, and though they aren’t aimed at secret filming in factory farms, Tom Laskawy from Grist says the effort is coordinated. “Big Ag has been known to coordinate legislative campaigns state by state,” he said, pointing to Monsanto’s ultimately unsuccessful push to prohibit labels on milk that alert customers to the presence of artificial hormones.

A bill introduced in the Minnesota House in early April punishes not only videographers who pose as workers and record the inhumane treatment of animals, but also those who distribute said videos. The bill seeks to make it a felony to disrupt operations at factory farms, a component intended to punish activists and protesters. One of the sponsors is Rep. Rod Hamilton, a former president of the Minnesota Pork Producers.

I DO have a problem with the Animal Agriculture Alliance inferring that "Radical Vegans" are behind some of the photos. However, they do say these people shouldn’t have to sneak the cameras into the farms that are torturing animals or mistreating workers: the cameras should already be there. It should be the state’s responsibility to find and monitor the few farmers that are giving the rest of them a bad name. You want to quiet the crazy vegans with the video cameras? Do their job for them.

Here are some links for more information:

http://www.slowfoodusa.org/index.php/slow_food/blog_post/goats_pigs_cows_farm_dogs_ready_for_their_close-ups/

Blogger Editing and Posting was AWOL

Sorry for the delay in the 2 posts below. They were scheduled for just after midnight EST on the 11 and 12, but Blogger was screwed up for any editing and new posting since mid-day Thursday.

Thursday, May 12, 2011

Hand Churned Ice Cream


Real ice cream. When is the last time you had any real ice cream, made with just the natural ingredients of milk, heavy cream, egg yolks, sugar and a flavoring like vanilla? NO guar gum, no food grade carrageenan, no locust bean gum, no skim milk, no artificial flavors...


I was gifted a new wooden ice cream churn (hand cranked) last fall and I will take it in a few days to a gardening get-together at a state park. I'll make my family ice cream custard recipe the night before and pick up ice along the way; there will be a few kids at our party to help crank the churn.

Vanilla Ice Cream
4 egg yolks
1½ cup sugar, or more to taste
2 quarts whole milk
2 cups heavy cream (luckily I can get non-Ultra-pasteurized)
½ tsp salt
1½ tsp vanilla, or to taste

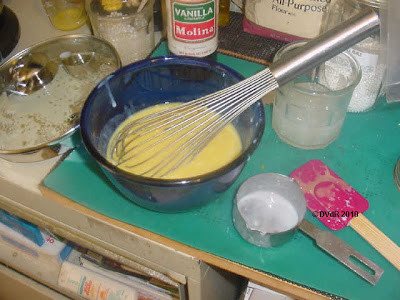
Beat 4 egg yolks until fluffy. Add sugar and mix until pale yellow. Scald 1 quart of the milk; add the salt, then cool enough so it doesn't cook the eggs; slowly add the egg mixture, whisking it in slowly. Cook over low heat, stirring constantly to make the custard. Do not let it boil!

Mixture is done when it coats the sides of a spoon. Cool.

Add the cream, the rest of the milk, and vanilla. Chill, then freeze in a churn according to the manufacturer’s directions.


YUM!

Tuesday, May 10, 2011

Feta, Take 3


I am determined to make good feta! Actually the 2 batches I have made previously have tasted just fine, but melted into the brine after just a day or three in the refrigerator. That is NOT how feta should store!

I didn't do anything different with the 'make' of this third feta, it is the same recipe as here. What I did do differently (based on input from other cheesemakers who initially had the same problem) was twofold. For one, I let the curds drain for 24 hours in the bag, as opposed to 3-4 hours in most recipes.
Secondly, after the cheese was cut into slabs from the hunk above, I salted it and left it at room temps for 3 days to harden. (See photo at top.)

Half-gallon jar with feta slabs, ready for chilled brine

Then I made a batch of light brine with whey as the liquid, and covered the cheese. I added 3 mL calcium chloride to the half-gallon of brine, in addition to 400 grams of salt.


So far, so good! The brine is not clear because I used whey and not water, but if my 'advisors' are correct, this feta should keep for months if I don't eat it all first (which is likely with warm weather produce coming on; I love feta on salads).

Update: I made the feta on April 22, and put in the brine April 26. So far it is holding well!!

Sunday, May 8, 2011

Food Packaging Deceptions


This REALLY annoys me! I bought a 4-pack of grahams at Sam's to have on hand for a couple of cheesecakes I want to make with homemade real cream cheese. As you can see in the photo above, the contents are well below the top of the box, whereas they used to fill the box completely.

I know these are "sold by weight" but WHO remembers how much a box of grahams used to weigh???


Not only are the contents lower in the box, they are also several crackers shy of filling the width of the box. I'd much rather knowingly pay more (I actually did pay more anyway, considering the contents!) than to have this deception practiced on me.

Friday, May 6, 2011

Tapioca Pearls in Puddings


I love tapioca pudding but I've never made any from scratch, or if I did it has been so many years that I've forgotten. Recently I spied a bag of tapioca pearls on the shelf of an Amish market I frequent, so bought some!

A search on the internet for tapioca pudding recipes brought up several, and searching for just tapioca to see what else I can do with it, brought up Bubble Tea, sometimes called pearl tea. It is something unfamiliar (Remember, I live in the sticks, LOL!) to me but sounds interesting for the possibilities. 

I decided to combine several recipes for my first tapioca pudding, and I WILL play with making bubble drinks... but that will be another post.


On to the tapioca pudding. Here's a ½ cup of pearls soaking in 1½ cups water. They will soak overnight. In just a very few minutes, the pearls have already increased in size.


The next morning, I heated 1 quart of milk with about ¼ cup of sugar, and when it came to almost a boil, I added the soaked tapioca pearls I had just drained. and about ½ teaspoon of salt. Cook over medium-low heat, stirring occasionally, until the pearls turn fully transparent. All of the recipes I found call for more sugar (often 1½ to 2 cups total) than I am using, but since I have to cut back on sugar, I am just adding enough to taste slightly sweet.


Next: beat 3 eggs in a separate bowl, add 1 teaspoon of vanilla, and more sugar to taste if it needs it. (I didn't add more.) Remove the mixture from the heat and allow to cool enough to add the egg mixture.


After the milk mixture had cooled considerably, I tempered the egg mixture with a little of the warm milk before adding it to the rest of the cooked milked. When you do add the eggs, vanilla and sugar mix to the cooked milk and tapioca, stir thoroughly, and bring to a full boil. Remove from heat. Serve warm, or allow to cool and refrigerate.


It was lovely to have a bowl of tapioca pudding that was not full of chemicals, just real milk and eggs thickened with tapioca (which is made from the cassava root).

Options: Dust some cinnamon over a serving, or add coconut, nuts, fruit, chocolate, or whatever strikes your fancy. YUM!


ps... I'll have a fun post about other things to do with "pearls" later on when the garden is in a slow growth period and I have more time.


Wednesday, May 4, 2011

Another cookbook?


I vowed 2-3 years ago NOT to acquire more cookbooks, and in fact have given away a substantial number of them in the last 2 years. However recently I ordered not just one, but 2 used cookbooks, each under $4. Old cookbooks to be sure, and cheap, but I think they will be useful now, and in the times ahead.

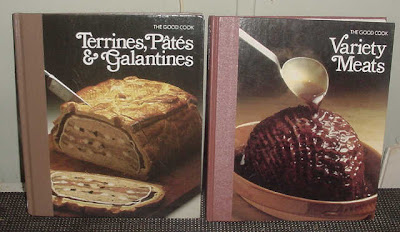
Both are from the Time-Life Series The Good Cook Techniques and Recipes published in the 1970's. The first one is Terrines, Pates and Gallantines. Think meatloaf advanced to high school or college level... a fine way to make delicious entrées out of less expensive cuts of meat.

The second one is Variety Meats: how to cook those meat cuts our grandmothers cooked... and we never buy, like sweetbreads, heart, kidneys, tails, and even pigs feet.

While I have tried some of the cuts labeled "Offal" in the past year, I really have not made a dedicated effort much past one recipe each. That's to my shame because everything I read about the nutritional values of those cuts says they far outshine the nutritional value of steaks and chops. It's time to get serious and try to make tasty meals, and make peace with my preconceived notions.

Monday, May 2, 2011

Pork Leaf Lard, Finally!


In the several posts I've made on rendering fats on this blog, I have described "leaf fat" (which makes the very best lard, and pork leaf lard makes the very best pastry) as being waxy. I was right, and I was wrong... apparently. The beef leaf fat I got last year was indeed waxy. However, I just received 5 pounds of PORK leaf fat, and it bears NO resemblance to the beef leaf fat I've obtained in the past. (Note: this is from pastured pork, not from a CAFO.)

My 5 pounds arrived frozen, packed in extra dry ice still in the cooler, and I just chucked it in the freezer when it was delivered. Last night I put it in the refrigerator to defrost overnight, and today began rendering it on the stovetop.


The 5 pound "thing' is one big mass, although it must have been many individual pieces when it was removed from the hog(s). It is very soft at my room temp of 66-68ºF, and sticky to cut. The first portions I actually cubed before putting in the pan with about a quarter-cup of water. They soon started rendering and I added 2 slabs (not cubed) just to see how they fared. They became almost mush within about 5 minutes, and I "cut" them into smaller chunks with my whisk so they would have more surface area exposed to heat and thus render better.


Here's the first half, rendered, strained through 2 layers of fine butter muslin, and now cooling. The lard will turn white when fully cooled, and then I will weigh them. The small container is "cracklins'". 


Here's the finished goods. A total of 4.52 pounds of leaf lard and 7½ ounces of cracklins, for a total of 4.99 pounds. Since this rendered lard is soft rather than hard and waxy like the beef tallow, I plan to store it in the freezer.

Next on my list to acquire is duck fat or goose fat. Probably easier (and cheaper) to aim for duck fat. I will use some for confits, and some for frying potatoes... which I understand makes an incredible fry... and freeze the rest.