Monday, January 31, 2011

Slow Cookers and the Danger Zone

My new slow cooker

I have a new slow cooker, and it is lousy. It overcooks, scorches and burns. At first I just thought I had a cheap cooker, but then I began to hear my friends voicing the same concerns. It appears the Powers That Be have decided they know more about what is right for me than I do. The old slow cooker I had for years finally died and I had to buy a new one. They are all the same except for looks and control gadgetry, right? Well the answer is Yes... and No. 

Yes, the new models all work just about the same... and No, they do NOT work like the old ones! They get much hotter, to the point of abusing the food in them.

Every person who has ever packed picnic food, or who has canned food at home, or made cured meats knows there is a DANGER ZONE in food for safety. That danger zone is between 40ºF and 140ºF,  because it is within that temperature range that the pathogens proliferate. (Bacteria that cause disease are called pathogens; not all bacteria are pathogens however. When certain pathogens enter the food supply, they can cause foodborne illness.) That's why our refrigerators are designed to keep foods chilled below 40ºF (or frozen to 0ºF or below). Pathogens will still grow at low temps, just very slowly. Cooked foods need to reach at least 140ºF to kill any pathogens in them, and kept at 140ºF or warmer after being cooked, OR chilled to below 40ºF.


Water is pasteurized at ~150ºF and food is pasteurized at ~160ºF. Note that pasteurized means the destruction of all bacteria that may be harmful to health (pathogens). There are two primary methods of pasteurization: the liquid can be heated to 145ºF and held there for at least thirty minutes, or the liquid can be flash pasteurized at 161ºF  for a minimum of 16 seconds. After pasteurization, bacteria can still appear. It is important that foods be safely handled and stored at every step of the supply process from animal, fruit or vegetable to stomach. In most cases, after food is pasteurized it should be refrigerated.

After pasteurization, bacteria can still appear. It is important that foods be safely handled and stored at every step of the supply process from animal, fruit or vegetable to stomach. In most cases, after food is pasteurized it should be refrigerated. Keep cold foods cold. Keep hot foods hot.

Fish is cooked at 125º-140ºF; beef is cooked at 145º-170ºF; pork is cooked at 160º-170ºF and chicken is cooked at 165º-180ºF. According to the USDA Food Safety and Inspection Service (FSIS), the recommended minimum temperatures, to kill off potentially harmful bacteria are:
* Beef, veal, and lamb steaks, roasts and chops: 145ºF
* All cuts of pork: 160ºF
* Ground beef, veal and lamb: 160ºF
* All poultry: 165ºF
* When reheating cooked food, heat to a minimum internal temperature of 165ºF.

My old slow-cooker

The older slow cookers generally had a temp range on the low setting of around 185ºF, which was acceptable even if a bit high for slowly cooking foods over a long time. Newer slow cookers generally heat to something over 200ºF on the low setting, and over 300ºF on the high setting. I couldn't find the average temp for the "keep warm" setting, but my new slow cooker simmers with tiny bubbles on "warm". There is a thread on one of the forums I read about the newer slow cookers. NO ONE is happy with them. They now cook with higher temps that overcook and sometimes burn the food.

I decided to check out the heat range in my new cooker by filling it 2/3 full with warm water (115ºF) and see what it actually does. I started it on HIGH, as I would do for food. Note, times are from the beginning, or from the previous change in temperature setting, NOT from the previous reading.

Initial water temp: 115ºF
Set Temp Control to HIGH
After 1 hour: 160ºF
After 1½ hours: 175ºF
After 2 hours: 200ºF
After 3 hours: Boiling, 212ºF
Reduced Temp Control to LOW
One hour later: 200ºF
Two hours later: 200ºF
Three hours later: 200ºF.
Reduced Temp Control to KEEP WARM
One hour later: 175ºF
Two hours later: 175ºF
Three hours later: 175ºF

I am going to let it cool down overnight, and start again set to WARM tomorrow. I need to know if 175ºF is the temp it will heat to initially after setting just to WARM, or if that's the temp a cooked food will cool down to and then stay there to keep warm.

My, my... how interesting (and possibly dangerous)! I started my slow cooker on KEEP WARM, with the cooled water from last night, now @ 75ºF.

One hour later: 100ºF
Two and Three hours later: 125ºF
One more hour: about 150ºF, and a bit higher (165ºF) as the heat cycled on.
Then I turned the control to LOW
In one hour, it went to 175ºF
In another hour, it went to 180ºF
In another hour, it jumped to 200ºF, and stayed there all night.

Here are my conclusions:
1. Using the HIGH setting is clearly too high, and overcooks.
2. Starting on LOW with something already lukewarm still cooks it too hot to suit me, although it takes almost 2 hours to get to 200º. It will maintain 200º as long as it is turned on.
3. Starting a refrigerator-temp meat on KEEP WARM has the meat in the DANGER ZONE (40ºF - 140ºF) for far too long, over 4 hours. But then it keeps it between 150º and 170º.

So, what seems safe to me now, is to begin with a heated liquid (over 140º) and perhaps browning any meat before putting it in the warm liquid in my slow cooker, and setting it to Keep Warm, where it will stay in the 150º-170ºF range. I will be satisfied (but not happy that it's not like my old one), and feel my foods are safe and not overcooked or burned by doing it this way.

Research shows the common causes of food poisoning in the home are generally due to unsanitary conditions, and leaving cooked foods or raw fish and meat at room temperatures too long. There are occasionally reports of food poisoning from undercooking foods, but no data linking between those undercooked foods and a slow cooker!

At any rate, the manufacturers have determined that making the slow cookers cook hotter is in our best interests. (It probably IS the best option for my sister!) However, any idiot can still turn a slow cooker OFF before food is fully cooked. What's next... a "hot" slow cooker that will not turn off in less than 8 hours, or not even allow us to unplug them??

Saturday, January 29, 2011

Vegetarian Sausage?

I believe there must be some Vegetarians who read my blog, and who were sorely bored (or even affronted) with the several posts on my efforts to make sausage.

Here's a peace offering. None of these are my own recipes, but I have provided links where I had them..

Veggie Sausages

You can adapt any recipe by replacing the meat with beans or grains, and adding eggs or egg whites. These can be formed into patties and fried or roasted , or put into Casings. If the vegetarians can't eat the casings, a substitute, albeit expensive, is to use leeks. Trim whole leeks and blanch in simmering water for 2-3 minutes, then drain and place in cold water. When cool, gently push the center out of the leeks, and use the hollow leek outer pieces as casings. Or, try this recipe:

Polish Veggie Sausage

8 ounces tempeh

1 can (15 ounces ) cooked beans (any color), drained and rinsed (I use red kidneys)
1/2 cup chopped onions
2 garlic cloves, minced
1 tsp smoked paprika
1 tsp freshly ground pepper
1 tsp kosher salt
1/2 tsp dried savory
1/4 tsp ground allspice
2 large egg whites
2 Tbsp olive oil
1/2 cup fresh breadcrumbs

Steam tempeh for 10 minutes, cool, then coarsely grate with a box grater.
Put in a food processor with all the ingredients, and pulse until thouroghly blended. Place in pastry bag (or large ziplock bag with a corner cut off).

Lay a sheet of plastic wrap on the counter. Pipe a 3/4 inch line of the sausage mixture along the plastic fo about 5 inches. Gently roll up the plastic wrap into a sausage shape. Tie off one end with kitchen string, then tighten the other end and tie off.

Continue until all sausage is used up. Place in simmering water, and poach gently for 10 to 12 minutes. Plunge into an ice bath, then cool completely.

t serve, gently reheat in a little oil until lightly browned.
From Richard in Norway

Garden Sausage

Makes 2 large sausages, enough for 8 to 10 appetizers or 4 entrées

Serve this vegetarian sausage as an appetizer with crusty French bread spread with mayonnaise spiked with Creole mustard. It’s a delicious accompaniment to pasta, risotto or oven-fried potatoes. Freezing is not advised, as it spoils the texture.

Ingredients:
2 ribs celery, cut into 1-inch pieces
1/2 small red bell pepper, seeds and stem removed, cut into small chunks
8 ounces mushrooms, stems trimmed, cut into small chunks
2 tablespoons extra-virgin olive oil
1/2 cup thinly sliced green onions
1 teaspoon pressed garlic
2 large dried bay leaves, midrib removed, ground in a spice mill
1 teaspoon chopped thyme
1 tablespoon chopped sweet marjoram or Italian oregano
1 teaspoon chopped sage
2 tablespoons chopped parsley
1/8 teaspoon ground cayenne pepper
1/8 teaspoon ground allspice
1/2 to 1 teaspoon salt
1 cup cooked rice
1 egg, beaten well
2 to 3 tablespoons soft bread crumbs
Additional olive oil to brown sausage

Directions:

Pulse the celery, red pepper and mushrooms in a food processor until they are finely chopped, but not pureed. Wilt them in oil over high heat, stirring continuously. Stir in the sliced green onions and garlic. Add the herbs and spices, heating thoroughly.

Transfer the mixture to a medium bowl; add the rice and beaten egg, mixing well. Sprinkle in enough crumbs to absorb most of the liquid.

Lay a 12-by16-inch sheet of plastic wrap on a clean work surface. Spoon half the vegetable mixture evenly along 8 inches of the long edge. Form into a log by carefully rolling it away from you, wrapping the plastic tightly as you go. Twist the ends closed, and knot one end. Push the filling toward the knotted end to fill the wrap evenly, then tie the second end closed and transfer the roll to a baking sheet. Repeat with the remaining mixture. Refrigerate 1 to 6 hours.

Before cooking, prick the plastic wrap with a sharp, thin knife every 2 inches. In a large nonreactive skillet, heat 1 inch of water to just below simmering. Add the sausages, cover and poach for 8 minutes, or until firm in the center, turning once with a slotted spatula. Cool on a cutting board for at least 10 minutes, then remove the plastic wrap. In a small amount of olive oil over medium heat, brown the sausages quickly on all sides. Remove them to a cutting board and let cool 2 to 3 minutes, then slice each into 10 to 12 pieces.

There's a vegan take on a Glamorgan sausage that looks interesting here:
http://thegvc.wordpress.com/2009/04/26/glamorgan-sausages/

Thursday, January 27, 2011

Using Cardamom in Rice Pudding

I'm trying to learn about and use more spices that are unfamiliar to me, and this is one of them. Cardamom is not a common spice in American households despite extensive use in the rest of the world. Years ago I used to buy Dunkin Donuts that had a "handle' on them... just a plain cake donut. Now years later, the taste in their plain cake donuts isn't the same, and the handle seems to have disappeared along the way. Maybe no one dunks their donuts anymore?


After I tasted some cardamom cookies last year,  I think I finally know that the elusive hint of spice in the earlier donuts I so loved might have been cardamom, so I bought some whole green cardamom pods recently.

Split Cardamom Pod, after cooking in the rice pudding

Cardamom is an ancient spice, and second only to saffron in price. The taste is hard for me to describe, but others have said it is spicy, herbal and citrusy; it is generally used with cinnamon, nutmeg, allspice, clove or other aromatic spices. The best cardamom seems to come from Mysore (India). Above, you can see the tiny black seeds that are inside a pod. They dry out rapidly so it's better to buy whole green pods; you can grind the seeds in a spice grinder for freshness.

Like the real tapioca pudding I hadn't had for years but made recently, rice pudding joins the list of old-time desserts in my family. I found a recipe for a rice pudding flavored with cardamom and lemon, and it's cooking as I'm writing this.

Here's the recipe, which I got from the Epicurious recipe site but forgot to copy the URL. Recipe calls for cooking in a slow cooker, although I see no reason it couldn't be baked in an oven.

Rice Pudding with Cardamom and Lemon
Makes 6 servings

3 cups whole milk
1 cup heavy cream
4 large eggs, beaten
1/2 cup granulated sugar
1/2 cup packed light brown sugar
1 teaspoon vanilla extract
2 teaspoons finely grated lemon zest (from 1 medium lemon)
5 whole green cardamom pods
¼ teaspoon freshly grated nutmeg
3 cups partially cooked medium-grain white rice
1 cup golden raisins

In slow cooker, whisk together milk, cream, eggs, granulated and brown sugars, vanilla, zest, cardamom pods, and nutmeg. Stir in rice, cover and cook on high 1 hour, stirring occasionally. Reduce heat to low, add raisins, and cook 1 hour more, stirring occasionally. Serve warm, or refrigerate and serve chilled.

Like with most recipes, I only use about half the amount of sugar specified. In this case, I only added the light brown sugar and omitted the white sugar all together. I wasn't sure what they meant by "partially cooked" rice, nor did they say drained or not. I cooked mine until almost done but not water-logged.


Update: 
Pudding is now cooked, and indeed it seems cardamom might be my missing spice in those donuts. 

The amount of sugar was just fine without being too sweet, but the vanilla was a bit too much, so maybe just ¾ teaspoon? The recipe could use a tad of salt, perhaps ½ teaspoon? (or just more salt in cooking the rice!). The rice has mostly distinct grains when finished, which could be that my rice was a little overcooked enough that it didn't absorb the custard... OR maybe it's that I used basmati rice because that's the only white rice I had in the house... OR maybe even a combination of those 2 factors.

In any case, the rice pudding is very tasty but it doesn't have a crunchy top like baked rice pudding. Since the cardamom flavor was my goal, I'm quite satisfied with the taste. However, I think I shall tweak the recipe later for an oven-baked version.

Now I need to try some cardamom in my coffee, as they do in the Middle East!

Tuesday, January 25, 2011

Canning Pasteurizing Temperatures for pickles

If you have been reading my blog for a while, you know that last year I made a lot of lacto-fermented pickled vegetables. I did so because lacto-fermentation increases the nutritional content, and the veggies remain fairly crisp compared to vinegar-brined and water-bath-canned pickles.

Recently I came across this note on pasteurizing pickles from the Extension Service at the Univ. of Maine, which may interest some of you as a means of crisper pickles.

Low-Temperature Pasteurization Treatment

The following treatment results in a better product texture but must be carefully managed to avoid possible spoilage. CAUTION: Use this treatment only when recipe indicates. Place jars in a canner filled halfway with warm (120 to 140°F) water, Add hot water to a level 1 inch above jars. Heat the water to 180 to 185°F. Maintain this temperature for 30 minutes. Use a candy or jelly thermometer to check the water temperature, It must be at least 180°F during the entire 30 minutes. Temperatures higher than 185°F may cause unnecessary softening of pickles.

There are a few recipes on that page suitable for this method.

Monday, January 24, 2011

Did I Just Fall off the Turnip Truck?

Photo from ilovebutter

Apparently I did just "Fall off the Turnip Truck" ... well, at least as far as charcuterie is concerned. Probably because I live under a rock in Nowheresville. If I had been a Foodie, I would have known about the "back-to-the-cure" movement that has gripped food enthusiasts for the last 6+ years, ever since Michael Ruhlman's book Charcuterie: The Craft of Salting, Smoking and Curing was first published.

As it is, I am Jannie-come-very-late to the party. And actually, that's okay with me; better late than never! I've just spent several days reading through 2,929+ posts written (mostly by professional food folks, chefs, restaurant owners and the like) on making their own charcuterie based on Ruhlman's book... with The Man himself answering and/or responding to many posts. All this reading of course is on top of the hundreds of blogs and other forums on the subject (and books) that I have devoured over the last 2 years.

The are two things that stand out from all I have read:
#1: Making Your Own Bacon is incredibly easy.
#2: Once you make your own bacon, you'll never go back to store-bought bacon again (given the choice)!

Making bacon requires no equipment most of us don't already have. All you need is a refrigerator, a large zip-lock bag, salt, sugar, perhaps some spices or maple sugar to taste, and an oven. Oh, you do need some curing salt, called "pink salt"... which is 6¼% Nitrite (NOT Nitrate) mixed into regular salt...  but a pound of it is VERY cheap (under $3 pound), and just tiny amounts (portions of a teaspoonful) are generally needed per big slab of bacon.


I just bought a 2+ pound piece of pork belly (shown above) in an Asian Market for $2.99 pound, and with the addition of 3¢ worth of salt and cure, plus my time, I can make much better tasting and healthier bacon than I can buy at $7.99-$8.99 or more per pound! (Have you noticed store-bought bacon is no longer sold in 1 pound packages, but instead sold in 10 or 12 oz. packs?) I would have preferred a larger piece of pork belly to make bacon, but that's what the market had. It's okay for me to use it for practice, although everything I have read says it will it NOT fail if I follow the simple directions.

For those with chemical phobias amongst us (and that includes me): nitrItes (not nitrAtes) convert to nitrous oxide in the curing process... and nitric oxide (chemically written as "NO") has been shown to cause relaxation of blood vessels, and is therefore a key to treating heart problems and related ailments. The most important effect of nitric oxide is to relax the walls of blood vessels, an effect called vasodilation. The result is lower blood pressure and an increase in the flow of blood.

If you want more information, please read this article which talks about nitrates/nitrites in our foods:
Meanwhile, I am working up the courage to start my first bacon cure using the above pork belly section that is still in my freezer. I have no idea why it is scary... it just IS. I'll be back with photos of the process as soon as I screw my courage to the sticking post and get started!


PLEASE keep in mind as I struggle through this that my ultimate goal is to produce edible, highly nutritious and very tasty foods from those pieces-parts that are the cheapest to obtain (for now, anyway). If things continue to get tougher, it might be ALL we can get, so it would be good to know in advance how to use those parts. 


Caveat: My local farmers who raise pastured pigs are now asking up to $9 per pound for pork bellies, due to demand from the upscale market. That's insane, and I won't buy it. The pork belly shown above is also from pastured pork, just not from the "let me gouge you" farm.

Sunday, January 23, 2011

2 Very Useful Kitchen Gadgets

I really LOVE kitchen gadgets, and have to be careful lest I end up with a drawer full of gadgets I seldom use. Here's a couple I plan to buy soon, and both are replacements or upgrades for what I already have.


The first is a jar scraper. It will be a replacement for one I have that is so old the silicone rubber has hardened enough to break off in tiny chunks if I am not careful. I have looked off and on unsuccessfully for a replacement one for 10 years, and finally found one at Fantes

The one pictured above is 14 " long with a silicone blade that measures 1" from top to bottom of the blade and almost 2" wide. Perfect for mayonnaise or peanut butter jars! It is $4.99, dishwasher-safe and imported from Spain.


On the same page is another one that appears to be almost identical but made in China; available in assorted colors, and cheaper at $2.79.


The second gadget is another beater blade for my mixer. About a year and a half ago, I posted about the new beater blade I bought for my KitchenAid Mixer. The old one works okay, but by the looks of this one, the design is highly improved. No more stopping the mixer to scrape down the sides of the bowl!

Flex Edge Beater for 4.5- and 5-Qt Stand Mixers, $29.99. Coated metal with flexible edge, Dishwasher safe.
SKU# KFE5T, Fits KitchenAid models K4, K4B, K45, KSM45, KSM90, KSM95, KSM100, KSM103, KSM110, KSM150, KSM151, KSM152, KSM155


Amazon now carries this one shown above, for 6 Qt. and Pro-5 KitchenAid Mixers, $29.95.


Note: I have no affiliation with Fantes except as a customer. They have been in business almost forever, and I have even visited their shop in Philly years ago when I lived in Annapolis. I get the filters for my Chemex coffee maker from them. I also have no affiliation with Amazon except as a customer.

Friday, January 21, 2011

Chorizo with Parsnips and Rutabaga

As part of my efforts to eat less costly meals and less familiar vegetables, I made a dinner of pan-fried chorizo (sausage) with the root vegetables parsnips and rutabaga. (In some parts of the world, the rutabaga is known as a Swede.)


I peeled and diced a large rutabaga and put it in a hot skillet with some coconut oil. (Any oil, tallow or lard that will take some heat will work.)


The rutabagas were cooked until soft and browned, then removed to a plate.


Next, I partially cooked the peeled and diced parsnips in the same pan. I want to finish cooking them in the flavored oil from the chorizo, so that means cooking the chorizo next.


I sliced and sautéed a couple of chorizos in some bacon grease, just until they were slightly browned. Then remove the sausage to a bowl or plate, leaving the chorizo-tinted and flavored oil in the pan. 


Add the partially-cooked parsnips to the remaining oil in the pan, and cook until browned and soft. 


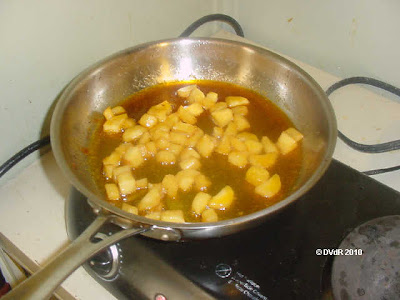
Return the chorizo and rutabagas to the pan with the parsnips, stir well and heat thoroughly before serving. Season with salt to taste; you probably won't need any pepper! The sweetness of the parsnips is a good balance to the spicy chorizo, although I should have used one more parsnip, and I added the juice of half a lemon just because.... 

Serve with a green salad. YUM!

Thursday, January 20, 2011

On towards Charcuterie 101

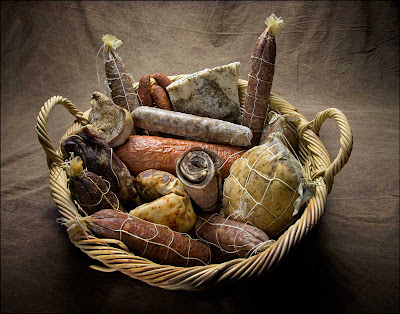
I just flat-out stole this photo from Salumi Artisan Cured Meats' website because it is so wonderful! Clockwise from top: Lardo, Oregano Salami, Lamb Prosciutto, Culatello, Salumi Salami, Hot Sopressata Salami, Mole Salami, Lomo, Guanciale, Finocchiona Salami, Smoked Paprika Salami. Center from top: Cotecchino, Cotto, Coppa, Pancetta.
 
During all the sausage-making recently, I put aside (in the freezer) several small-to-medium venison haunch muscles cleaned of all silverskin, fat and tendons. When it gets warm enough to work outside however briefly with my cardboard cold-smoking set-up again, I want to play around with curing some bresaola, only with venison instead of beef. I'm starting with a little bresaola just because it is simple! (Bresaola costs $20-$25 per pound on average, plus shipping and handling if bought online.)

Bresaola is not common in the US, and is usually made from beef that's cured with salt mixed with tiny amounts of nitrates and nitrates to prevent botulism, marinated in the cure plus any spices of choice for 2 weeks, and then hung to dry for 2-4 weeks. The resulting meat is thin sliced... think 'creamed chipped-beef on toast' without the yucky taste and you have the general idea of the meat (the commercially dried sliced beef available in small jars tastes too much like chemicals and salt to suit me). Bresaola is good with cream cheese on toast rounds, too.

I also plan soon to try making prosciutto and pancetta, curing and cold-smoking some pork belly for bacon, and other such things when I can re-stock the freezer with more pork and lamb. Plus I need to buy some additional curing salts and bacterial ferments. Curing salts are not necessary for fresh sausage (although plain salt IS required) even if freezing them, but absolutely essential in any meat product that is smoked, dry-aged, or otherwise cured. (Unless you want to use a relative or in-law as a guinea-pig for any possible botulism contamination, which is tasteless and odorless!)

Earlier generations cured their hams in salt and sugar, and often had access to saltpeter which they also added as a preservative. Saltpeter (potassium nitrate) is no longer allowed for use in commercial curing of cooked or smoked meats and sausages, nor recommended for home curing. (US FDA 1999) Instead, there are curing salts available that contain regulated but limited amounts of nitrates and nitrates in a salt base. These mixes are generally known by such names as Prague Powder #1 and #2, Insta-Cure #1 and #2 and Modern Cure #1 and #2; they help prevent the growth of pathogens in meat.

Nitrates and/or nitrites alone do not produce the curing reactions of flavor, color and shelf-life. Nitrates must be reduced by lactic acid bacteria, which makes the bacterial fermentations that affect taste, color, texture and shelf-life... much too lengthy to explain in this post.

As I'm writing this, we are coming off a winter storm and the outside temp is 9ºF, not the outside temps I care to work in. I'll probably need a 2 week window of few to no storms to have time to cure meat in the refrigerator a few days or weeks, and then smoke and/or hang. I hope to make a varmint-proof box for the root cellar, and need to monitor the 24 hour temps in it to be sure first that I can use it to hang meats.

I doubt I can afford the controls this winter to actually make a temp and humidity controlled box, even if I manage to get a free freezer or old refrigerator. The promised free wine chiller unit hasn't appeared... so far, and another one has also been promised!

Update: I have been monitoring the hi-lo temps and humidity in my root cellar and so far it looks favorable to hang cured meats (or hard cheese) to age! Whoooeee! 

Now I'm just waiting on the curing salts to arrive so I can start curing the venison bresaola.

Wednesday, January 19, 2011

One of those Epiphany Moments...

I am interested in so many things that my Bucket List is quite long. I jotted the text (excerpt) below on a chat forum the other day, and what became an epiphany overnight is in the word "permission" that I used. Read on...

My life has recently taken a turn I never expected... nor do I know what will come of it, if anything but a bit of my own pleasure. I'm always interested in a slew of things, some of which dominate for a bit and then move to the side until I come back to them.

I've been playing around with charcuterie off and on for about 2 years now (mostly uncured sausages thus far), but it has finally bitten me hard. Some of it may have to do with finally giving myself permission to eat all those things we were told for years were bad for us, but for whatever all the reasons are, I am fully committed to learning (and doing) all I can about meat curing. In this country it really is a lost art.

I have thought long and hard about that statement of permission, since those words backed with little thought just came out of my mouth at that moment in time. The more I have thought about it since then, the more I realize it is true that I have given myself permission to eat all those so-called "bad" things.

Over the last few years there have been an increasing number of Voices saying Fat really isn't bad for us... just some kinds of fat. (Those voices are now being supported over and over by medical research.) The fats that are bad for us are manufactured fats and processed fats, but animal fats have been the ones taking the rap. 

For all I have written over the last 2 years about health and fats, it still has been hard for me to accept fats on some very deep level even though I eat them, cheese and bacon being favorites. I still have a knee-jerk reaction to the fat layer on top of cooled homemade stock or soups... and often start to remove it before thinking. So you can imagine how difficult it has been for me to deliberately grind up a pound of pure pig fat to mix with ground pork or venison for sausages.

Now that I realize I am actually looking forward with great anticipation to making some cured meats for myself, I realize that I have finally (subconsciously) given myself permission! It must be the same for a Vegan who decides to finally eat bacon, LOL.

Photo by JeffreyW

It may still be hard to take the first bite of some of the products I want to make, simply the knee-jerk reaction from years and years of brain-washing against fat. The cured sausage above is a Saucisson Sec, a French dried sausage that's spiced, cured and aged. You can still see the chunks of pork fat in the mix, and it's even more pronounced in some larger cured sausages.

Of course, many things will not induce the same initial aversion. After all, I grew up with country cured hams, fatback, bacon and fresh sausage. I just think I can make better, tastier products than those of my youth, given enough time and the safer cures and techniques available now.

I'm beginning to understand nitrates and nitrates better, and that in very long aging they convert to harmless substances. I have many recipes that do not require them at all, but many of those meats usually require refrigeration or freezing for long-term storage. I'm looking forward to smoking my own bacon... and ham hocks; the ham hocks I have purchased in the stores the last 2-3 years have either been rancid or nasty looking, and the bacon insipid except some of the most expensive.

Certainly I could not afford to buy some of the best imported cured meats, but I can make a delicious alternative now that I have permission!

Monday, January 17, 2011

More on Rocket Stoves

A continuation of thoughts posted here: Baking without an electric or gas oven

I've been looking into Rocket Stoves, and they are easy (and cheap) to make and operate. One problem with making one out of tin cans is that they rust out and need to be replaced perhaps as often as every 6 months. I have a hard time with things that are destined to be thrown "away" because "away" is just a pile somewhere out of my sight. It doesn't really disappear... someone else will have to deal with "my junk" sooner or later, from wherever 'away' happens to be.

So I'm wondering if a ready-made and more substantial Rocket Stove might be a better bet as a back-up means of cooking for me, even at the cost? 

StoveTek 'GreenFire Flex' (Wood-Charcoal Stove)

StoveTec sells one that burns either wood or charcoal for under $90 with free shipping, and it's made from steel, or at least a galvanized steel pot skirt (not shown... and the photos on their website are woefully inadequate) with painted steel metal body and legs. It has a cast iron stove top, an insulative abrasion-resistant combustion chamber, a fuel grate, and 2 doors with sliding covers.

StoveTek Rocket Stove, probably the wood burning only model

I'm not sure I could actually travel around and hunt the proper materials, and then find and pay someone to do the cutting and welding any cheaper than the cost of buying a manufactured one.

Sunday, January 16, 2011

Why do we self-destruct?

Or, maybe I should say why do "I" self-destruct?

Ten months, ago in March, I made a radical shift in my meal choices based on some input from my Endocrinologist and further research online. It didn't take long to begin to feel the effects. My energy levels rose, my sleep improved, my skin got a little better-looking (that's saying a lot for 70 years of abuse and wrinkles!), and my overall disposition improved. 

As a by-product of the food intake changes, I also lost body fat, to the tune of about 30 pounds. I was beginning to look like my former body was emerging from its insulating layer! Then for my birthday at the beginning of November, I had some birthday cake... and the back-sliding began. Little by little, sugars and starchy carbs crept back into my diet and now they are rampant.

I suppose on some level I didn't actually want to believe sugar was so addictive, even though I know it intellectually. Oh, I can rationalize some of the carbs back into my diet as due to the time of the year. Potatoes are cheap and abundant, green vegetables aren't. Or, "My food budget is down because my heating costs are up during winter." Or, "The weather outside is nasty, and Comfort Foods feel so good.

The litany could go on and on... to include the Holidays (and we all know about Holiday Foods!), or being snowed in without power for several days and eating whatever was on hand even if it was wrong. But in the final analysis, it's all the head games we play. "One little slice of cake won't hurt me." 

Did I actually let the childish imp who lives inside me make the decisions of what goes in my mouth? Did I give in because it was the path of the least resistance? Did I allow some remnants of old and false food beliefs I had accumulated over the years thanks to advertising and food/medical PTB (Powers That Be) a space to still hunker down in my belief system?

Probably all of the above, in some fashion. Whatever the reason(s), I am now feeling almost as lousy as I did last March. I'm not sleeping well, my outlook is nigh on to depressing, I have no energy... and I have no one to blame but myself. I alone am responsible for the consequences of my choices and actions. No one put a gun to my head at the grocery store and made me buy those donuts!

I have re-gained about 10 out of the 30 pounds I had lost, which, of course doesn't make me very happy. The change in how I feel is what disturbs me most, and the weight is just a visible reminder. During the nearly 3 months I have been adding carbs back into my diet, I could have regained far more than just 10 pounds if I hadn't also been continuing a lot of the good foods I should be eating anyway.

So I'm facing a tough climb back to my protocol of a diet limited to 50g carbs a day. That will be difficult, or almost impossible, until I have more money in February to replenish my pantry. In the meantime, I have to eat what I have on hand or starve. I have plenty of meats, just not much in the way of probiotics like yogurt, and no eggs or cheese.

If nothing else, this diet departure has shown me exactly how destructive certain foods can be for me. IF I had any doubts about eating starchy carbs, 3 months has proven that I simply cannot! There's a definite parallel with the alcoholic and one tempting drink, to me and one tempting donut.

As a side note, it is NOT calories in and calories out for me. If anything, I was eating more total daily calories before I started adding in carbs. (Increasing carbs at a meal usually meant fewer calories from meats and other foods with good saturated fats.) My activity level (calories out) is pretty consistent over time. When I don't dig in the summer garden, I dig in the winter snow and haul firewood.

Saturday, January 15, 2011

Slow Roasting a Pork Shoulder


Pork shoulder is among the least expensive cuts of pork, often cooked for the Southern BBQ dish known as Pulled Pork. Recently, one of my pastured meat suppliers (Roffey Cattle Company) had pork shoulders on sale and I bought 2, intending to cube and grind them to add to my venison for sausage.

At the price, I expected bone-in shoulder cuts, but they came boneless and rolled. They looked so good that I decided to try one in a recipe posted by Hugh Fearnley-Whittingstall (of The River Cottage Meat Book fame) in the Guardian, for my New Year's Dinner even though the recipe called for a bone-in roast.

HFW says, "This sumptuous dish is based on a recipe by the late Edna Lewis, who specialised in the rib-sticking, soul-feeding dishes of the American South. Brining the pork first, then cooking it slowly before blasting the skin in a hot oven gives you juicy, tender pork, perfect crackling and a rich, savoury sauce - what more could you want for your feast?"

Between starting this process on Dec. 30th, eating it on Jan 1, and now writing about it today, I lost the first two photos due to a computer problem. I know these photos here make the roast look pale and gray, but it was a beautiful crisp, almost caramelized exterior and a pale pink interior... I really need to get a better camera (and learn how to use it)! The photos I lost were of just the raw naked roast, and one in the brine pot. I'm sorry I lost those photos, but the roast was too yummy and fork-tender not to post it anyway!

The recipe calls for brining 24 hours, but my previous experience with brining meats told me to only brine mine for 12 hours based on the smaller weight, lest it become too salty. It was perfect!

Here's the recipe and instructions. His instructions are in italics and my notes and changes are just plain text. I have a kitchen scale that measures in grams, but if you don't, there's a good conversion tool here.

For the brine
40 grams flaky sea salt
per litre (about a quart) of water
60g demerara sugar (brown sugar will suffice, but I happened to have some demerara on hand)
6 juniper berries, lightly crushed
1 tsp white peppercorns
A couple of cloves
1-2 dried chillies or 1 tsp chili flakes
A couple of bay leaves

Note: I added the entire amounts of brine ingredients per quart of water, not just the salt, based on my previous brine experiences. It took 3 quarts of brine to cover my meat, so I had 120g salt (half a cup); 180g sugar (3/4 cup); 18 crushed juniper berries (they are soft and crush with your fingernails unless they are old and dried out), 1 Tbs white peppercorns, 6 cloves, 3 small dried chillies and 6 bay leaves.

Put the ingredients for the brine in a large pan and warm gently over a low heat, stirring, until the sugar and salt dissolve. Remove from the heat, cool, then chill. Put the pork in a big clean plastic bucket or tub, add brine to cover and leave in a cold place for 24 hours. (Actually, I put the pork in my large stainless soup pot to measure how many quarts of water I needed to cover it completely, and then removed the pork back to the refrigerator while I prepared the brine. I chilled the covered brine in the pot outside in the snow!)

1 bone-in pork shoulder
½ tsp each salt and black pepper
2 tsp thyme leaves, chopped
3 garlic cloves, peeled and thinly sliced lengthways
12 bay leaves
2 onions, peeled and thickly sliced
2 carrots, peeled and quartered lengthways
1 bottle red wine (or port)
A good slug of double cream
Salt and freshly ground black pepper

Preheat the oven to 300ºF. Remove the meat from the brine, rinse and pat dry. Using a small, sharp knife, cut 12 evenly spaced slits into the skin about 2cm wide and 3cm deep. Mix together the salt, pepper and thyme, and spoon a little into each slit, followed by a sliver of garlic and a bay leaf - let the bay stick out a bit so you can remove it easily later. Sprinkle any remaining seasoning over the pork.
(Note: I only inserted the garlic slivers and bay leaf pieces; the salt, pepper and thyme mix was just rubbed into the surface of the pork.

Scatter the onions and carrots in the base of a roasting tin and put the pork on top, skin-side up. Pour in the wine, lay a piece of greaseproof paper over the pork, then seal very tightly with two layers of foil. Cook for four to five hours, until the meat is spoonably tender. Remove from the oven and up the heat to 425ºF. (Mine was small and cooked 3½ hours to reach the safe 160ºF on my meat thermometer.)

Remove and discard the bay leaves, then cut the skin away from the meat, and cover meat to keep warm. Strain the pan juices into a saucepan, pressing on the veg to extract as much liquid as possible. Skim off most of the fat. Slice the skin into thick strips, place on an oven tray and roast until puffed up, crisp and golden, 10-13 minutes.


To make the sauce, simmer the pan juices until reduced by half, stir in the cream and heat through. Roughly carve the meat, and serve with the sauce and crackling on the side.


I browned my roast first, although it was not listed in the recipe... and my pan would only hold about half the bottle of red wine. The recipe called for roasting at 300ºF but I did mine at 275º-280ºF. I also had no skin on my roast to cut off to crisp (after roasting). Nor did I reduce the pan juices or add cream to make a gravy. I preferred it just au jus!


The next day I sliced the remainder of the roast (which was still slightly pink in the center although cooked to 'done'), and reheated the slices in the au jus for dinner. The rest became another dinner and later sandwiches, so this 3 pound (before cooking) roast made 6 generous meals for me.

I must admit this was probably the tastiest and most tender pork roast I have made in years. I will certainly make it again. YUM!

Thursday, January 13, 2011

Baking without an electric or gas oven

The cooking dilemma during the time I was without power for several days was my attempts to bake on my wood stove, and I’ve been researching methods ever since.

My thoughts at the time were that a cast iron container like a Dutch oven would work, although I don’t own one. More thoughts, research and trials on that idea have squelched it for direct baking. If you pour a cake batter in a pan, the bottom of the pan (where it sits directly on top of the wood stove) overheats and burns the batter; at the same time, the center of the batter remains mostly gooey and uncooked.

One alternative is to put some supports in a Dutch oven to hold a cake or muffin pan off the bottom, which will then cook the batter in the heated space (when the lid is placed on top of the oven) creating an “oven”. Duh! That would be fine if you have a huge Dutch or French oven (big ones cost upwards of $275 or more), and/or very tiny pie, cake and muffin pans… and baking just for one person in a smaller cast iron covered pot. Fantes carries some assorted small anodized baking pans, and Amazon carries some stainless steel baking pans that might fit in a larger cast iron oven.


Note: Dutch Ovens were designed for cooking inside a fireplace with a chimney, or over an open fire, used by placing hot coals on top of the lid as well as under the pot. The coals over and under the pot assured even cooking. Not something you'd want to do on the top of a wood stove inside the house!

I was looking at metal pans more for my tabletop electric convection oven (as long as there is power) because I cannot use glass pans in it for cooking, and I found the smaller pans I could use in my small cast iron covered pot (when power is out) listed at Fantes. I prefer NOT to use any aluminum cookware or non-stick coated cookware, and do not even own any except one small skillet I use very carefully on lower heat temps, and only for eggs.

Several folks have used a camp oven like the Coleman Oven on top of a wood stove, but with iffy results. The problem with a camp oven seems to be that it doesn’t get hot enough to really bake, and there isn’t much insulation in the walls to hold heat. I suppose if you are camping and cooking over an open fire, it doesn’t matter too much; food is either charred or undercooked... kinda goes with camping!

All those thoughts, though, brought up things like solar cookers… fine when the sun is out, and easier in summer when no one wants to heat the house using an oven. In the winter when it's below freezing outside and perhaps overcast or storming, it's a different story. Since I’m starting to do some cold smoking of meats and cheese, I’m also looking for a heat source using very little fuel to make smoke.


Aha! A Rocket Stove would do the trick for cooking outside regardless of available solar sunlight, or could be used for creating smoke for my smoker! I’ve known about rocket stoves for a long time, and have even thought to build one, so I went looking again for building plans.

Rocket Stove from Tin Cans

Most rocket stoves are made from (used) metal cans, whether large rectangular cooking oil cans or large food service cans. However, few last longer than a few months due to rust. Of course if they are so cheap to make, just throw them “away”? (Just where IS “away” anyway?)

The Aprovecho Research Center near Eugene Oregon has worked on developing cooking apparatus for Third World countries for many years, and they publish some good ideas they have trialed and proven to work. (They do a lot of work and education on sustainable culture in many other areas as well. Check out their website!)


Aprovecho's Capturing Heat: Five Earth-Friendly Cooking Technologies and How to Build Them is a great PDF you can download free here. To my surprise, there were 2 plans for Rocket Bread Ovens! They are made out of 55 gallon metal drums, and can bake more than 20 loaves of bread at one time. They say 66 pounds of bread can be completely cooked using just 11 pounds of dry wood, and Rocket Ovens more fuel efficient than a beehive earthen oven. The oven used at the Research Center uses a 14 gallon drum as the fuel feed box, like the drawing above.

Some fancy sheet metal work on this rocket stove! (Source unknown.)

The Rocket Stove pictured above appears to have a chimney coming out of the back of the stove. If so, and IF you could make each of the cooking wells airtight, and if you could vent the chimney to the outside, you should be able to safely use the stove inside a dwelling. You'd need to be able to close off the fuel intake ports when the fires die down, or you'd get smoke and carbon monoxide coming from those ports back into the house. It should be cheaper to build one than to buy an antique wood-burning cookstove with an integral oven.

I have thought for a long time I'd like to build an earth oven in the yard, and last summer I even bought the wonderful book Build Your Own Earth Oven by the highly acclaimed Kiko Danzer, who is truly an artist in clay. Now I may choose to build a Rocket Oven instead, as the cost of materials is much cheaper and requires less fuel to bake in it.

I'm still playing around with baking on my wood stove using what I have available, and I will post any breakthroughs!

Tuesday, January 11, 2011

Hot Potatoes under the Bedcovers

Photo from jcmedinas photostream

I'm sure we all have heard the stories of putting hot potatoes, a hot water bottle, or even heated bricks under the covers at the foot of the bed to warm our feet when going to bed in a cold room that was far, far away from the wood stove. Brrrrrrr!

I want to take that 'technology' a bit farther here and apply it to cooking. What happens with a solid heated object like potatoes or a brick (technically both are a heat source) wrapped in blankets is that the heat radiates out for a long time, heating whatever is nearby... in this case, feet. To the extent that it works is dependent on a couple of factors. 

One factor is the mass of the heated object: the greater the mass, the more heat it holds, at least initially. So, if you have 4 hot potatoes and your sister only has one... who will have warmer tootsies? Another factor is the insulation around the hot potato. If the covering blankets are just a layer or two of thin cotton, they will not insulate very well, nor for very long. Pretty soon your tootsies will be just as cold as the room. However, if the cover is a thick down comforter, the heat may last for hours, continuing to warm your tootsies the whole time.

Now, consider a pot of stew cooking on the stove... actually boiling. If you have kitchen duty, you would probably turn the heat down to a simmer, add a lid, and let the stew cook under very low heat for a few hours. In earlier days, you would need to add a bit of firewood from time to time to keep the heat going. Today we just pay for some additional BTU's to keep the pot warm, and those are being calculated (and rung up) by the meter outside, unseen for the most part but a cost nonetheless.

However, if you took that same boiling pot and put it under the down bed covers, it would continue to cook... for free! It might take longer to finish cooking, depending on how well insulated the bed covers are... but you get the idea.


Now take that concept of the hot pot under the bed covers just a step farther... Construct some sort of a box (cardboard will do as a start) with a lid and place it in the kitchen, but rather than using the bed covers, line the box and lid with some really good, thick insulating material... and then when the pot boils, place it in the immediately in the box. Turn off the stove, cover the pot with the insulated lid, and go about your business. Your stew will continue to cook!

In the early 1900's, merchants sold what they called "Fireless Cookers" with great monetary success... and those were nothing more than a well-insulated box of either wood or more often, pretty painted metal to hold a hot pot (or two side-by-side) for further cooking at low temperatures, without any additional source of heat.

Urban Haybox Photo from Eithin's Photostream; (Note heat reflection but lack of insulation)
Long before the 1900's, folks with limited cooking fuel used the same principle, lining boxes with hay they had on hand for insulation, and so they became known as a "Haybox". Hay is not the best insulation material we have available now, but it will still do in a pinch. Here's a page with more information on fireless cooking.

This same principle applies today in solar cookers; they work best with an insulating barrier to the air outside the container and box, which would otherwise wick away the heat. Counteracting that heat loss is usually accomplished by enclosing the air space around the cooker with insulation in the walls. The better the insulation, the less heat loss.


Photo from thoth on Flickr

You can use that same principle to cook a breakfast cereal grain overnight in a good vacuum thermos. Measure a portion of a cereal grain (I like steel-cut oats) into a wide mouth thermos bottle. Bring the appropriate amount of water and a pinch of salt to a hard boil and pour into the thermos just before bedtime. Screw the lid tight, shake a couple of times to mix the water and grain together well, and set aside until morning. It will be perfectly cooked when you awaken!

Note: Thermos vacuum bottles vary in how well they are insulated. The small stainless steel briefcase-size one I use to keep my coffee hot after making coffee in my glass Chemex drip coffee maker only keeps my coffee fairly hot for an hour or two. The Nissan Travel mug I carry in the car will keep my coffee steaming for several hours, or an iced drink cold (and often with ice intact) overnight.

If your vacuum thermos has thinner insulation like my briefcase thermos, you could wrap it in an insulating blanket (or even a thick towel) to keep more heat contained for overnight cooking. You'll just have to fiddle with what works best with what you have.

Photo from fr:Utilisateur:Nataraja

The oriental bento box, and the stackable food delivery boxes such as the one shown above and used by many cultures could accomplish much the same thing if they were insulated.

I can see endless opportunities to reduce my electric consumption by using fireless cooking. Something as simple as some dehydrated soup ingredients and boiling water placed in my thermos at breakfast time for my lunch...a pot of rice started at noon and placed in the haybox/fireless cooker (which I WILL I build soon) for my evening meal? A meat and vegetable stew?

It may take some trial and error to see what cooks best, and what design and insulation of a fireless cooker works best, and I think this might be a fun and challenging thing to do.

Sunday, January 9, 2011

Sausage Making Trial and Error, Part Three


Italian Sausage (Pork) Links
Sausage Making Trial and Error, Part One
Sausage Making Trial and Error, Part Two


I'm starting to get the hang of making sausage links. Still, they would be more uniform if I had another pair of hands to guide the stuffed casings off the nozzle. You can see in the photo above that some are fatter than others. I tried rolling them out and moving the sausage more evenly in the casing, but the casing split in a couple of places. (Could that be because the casings had been refrigerated 2 days in water, rather than one as suggested?) There's about 2 pounds of sausage in the photo.


Sweet Spanish Sausage


This next batch came off somewhat better. I pulled the stuffed casings with my right hand while I pushed the mix into the chute with my left hand. Not easy, nor consistent! 


This 2nd batch shown above is a recipe I found for Sweet Spanish (pork) Sausage, more of a breakfast sausage. I followed the recipe fairly close since it was my first time, but I thought the sultanas (white seedless raisins) it called for might be too dry. I soaked them in a dry white wine overnight, and then coarsely chopped them. The mix still went through the grinder again after mixing in the spices, so the raisin bits weren't all lumped together.


I fried the sausage left in the stuffer as a patty with my dinner. Interesting sausage, and it leaves a hint of several flavors on the tongue. I will make this recipe again!


Sweet Spanish Sausage with Sultanas (golden raisins)
adapted from sausagemania.com


1 pound ground somewhat-fatty pork
½ Tbs coarse salt
¼ tsp ground black pepper
⅛ tsp cayenne pepper
¼ tsp. ground ginger
⅛ tsp ground nutmeg
¼ cup sultanas, soaked overnight in enough dry white wine to cover
(note: you can use regular raisins, taste just won't be as delicate. Original recipe called for sugar which I omitted, and it did not call for soaking the raisins like I did.)


I made this recipe below into patties, for Christmas breakfast. Tasted kinda like sausage mixed with hints of pumpkin pie!


Alsatian Christmas Sausage
adapted from sausagemania.com


1 pound ground pork
½ Tbs coarse salt
¼ tsp ground black pepper
¼ tsp ground cinnamon
½ tsp. ground ginger
¼ tsp ground nutmeg
¼ tsp ground cloves
½ tsp sugar


At least for the next month or two, I am through making fresh sausage (I think). I have about 30 pounds vacuum-packed in my freezer now, but some will be gifted to two of my neighbors, including the one who gave me all the venison. I have about a dozen more sausage recipes I want to adapt to my taste (plus a few recipe ideas in my head), and I'll probably make those in small batches to try first.


All in all, I'm feeling pretty confident about making fresh sausages, whether in casings or patties. I certainly understand more about making sausages and various  recipe mixes than I did with my first sausage 2 years ago, or even the first batch in this series.

Next will be sausage that has to be cured and/or smoked and aged, such as Kielbasa, Polish Sausage, Chorizo... and maybe I'll feel gutsy enough for something a bit more challenging, like salame, pancetta and prosciutto. Who knows, by next year I'll probably tackle a ham!