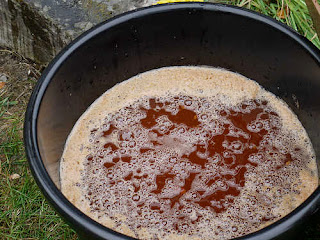
Homemade apple cider vinegar is easy to make. There are 2 basic methods, and if you happen to be a home-brewer, you may elect to start by making your own 'hard' cider. For the rest of us, the easy way is similar, but much shorter and less complicated.
Either way, the fruit sugars must be converted, first into a fizzy alcohol, then the alcohol breaks down in the presence of oxygen into acetic acid, which is vinegar. (Many home wine makers have inadvertently made wine vinegar instead of wine, myself included.)
To begin, you will need a container, some apples and a bit of some raw apple cider vinegar to use as a culture. Choice of apple varieties greatly affects the resulting taste, and I'll post later on apples for making cider. For now, just juice your own apples, or if you are lucky enough to be at a country fair where someone is pressing apples, get some fresh juice. Using bottled apple juice will not give you the health benefits of raw, unfiltered apple cider vinegar.
(I apologize... I lost who took this photo)
Fresh apple juice will start to ferment into alcohol on its own within a day or two (due to the yeast that naturally occur on the apples and in the air), so don't delay in starting this process unless you want to make hard cider. When you have your fresh juice, measure it, and add 5-6% by volume of the raw apple cider vinegar you obtained, or had on your pantry shelf. A half-gallon canning jar works well for fermentation, but if you have a crock, by all means use it but don't fill either one up all the way. Stir the mix well, pour into the jar, cover with several layers of butter muslin (fine muslin), and stick it in a dark closet. I fasten the cloth with a rubber band. The object is to keep dust out yet allow oxygen in, necessary for the bacteria to convert the alcohol into acetic acid.
The bacteria do their conversion work on the surface, so surface area affects total time to usable product. That's what makes a crock work better: less liquid depth to surface area. In a canning jar, it might take 3-6 months. During the fermentation, a "mother' should form on the surface, perhaps with spots or strands, formed by the bacterial digestion, and it will have a clean but sour smell. There should be no mold forming on the surface.
After several months, it should no longer have any fizz. When the fizz is gone, you know all the sugars have been converted! It should have a sour taste on your tongue, not a fizzy residual taste... and you have vinegar! Now, siphon off half the vinegar into a bottle, cap it, and you have raw, unfiltered apple cider vinegar ready to use. Take it internally, use it topically, use it on salads with extra virgin olive oil, cook with it... you'll love it!
With the remaining half still in the bottle, top it off with more FRESH apple juice, starting the fermenting procedure all over again. This process can go on for years, giving you a continual supple of good, healthy apple cider vinegar.
Here's another easy method I have read about but not tried: Put apple cores in a jar and cover with non-chlorinated water. Add 2 tablespoons raw apple cider vinegar. Put a breathable top to the jar, such as a fine-woven cloth fastened with a rubber band or string. When the bubbling calms down, you should have vinegar. Not much to lose. Hey, were you planning to save those apple cores for something else?


No comments:
Post a Comment
I'd love to hear what you think about my posts! We all learn together.